Removing the rear panel

It’s been a while since I did anything substantial to the Cinquecento, mainly because life got in the way. However I have been making a concious effort to try and get things going again, having purchased a welder and all the paraphernalia to go with it I have no excuse to not crack on with it!

I felt the only way to properly repair the rust and holes in the rear of the car was to remove the rear panel, giving more access allowing for a neater job hopefully making the repairs invisible. Also at some point during this cars life it was repaired under warranty by Fiat for rust in the rear off side corner, they however didn’t do the best job so I will be sorting this out as well.

To get the back panel out you first need to locate the many spot welds holding the panel in, these mostly run around the back edge of the panel, one on either side of the boot line (which I missed…), four on both vertical edge in the boot and two on either of the “legs” connecting the panel to the boot floor. First off though you need to remove the wiring for the rear lights and the cable for the boot latch, these can all be pulled back though the inside quarter panel holes.

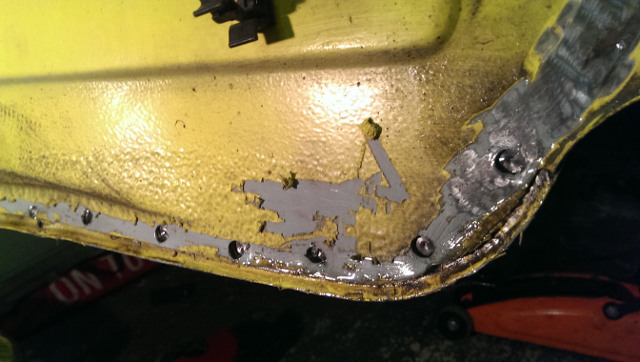
The best way to find the location of the spot weld is to run a bit of sand paper over the areas where you believe the welds to be, or where there is underseal around the bottom of the rear panel I used a screw driver to scrape it away leaving the tell tale dimple of a spot weld. I would recommend buying a proper spot weld removal drill bit, these help to stop you drilling through both panels making it easier to refit the panel later on.

Underseal and paint scraped off
Fiat cinquecento rear panel

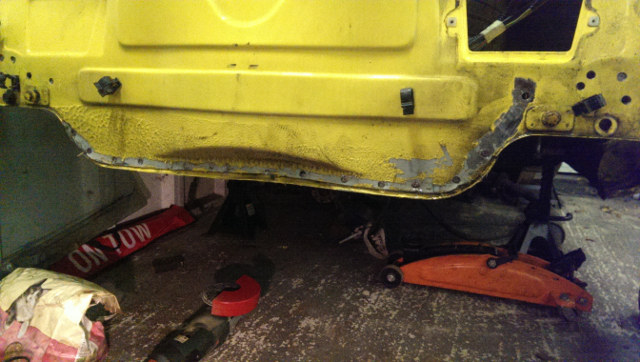
Started drilling out the welds along the bottom of the rear panel
Fiat cinquecento rear panel

Edge of the panel
Fiat cinquecento rear panel

On the inside of the car, there are four five welds at either end of the panel. I thought there was four but when I come to remove the panel I found a fifth weld on the horizontal lip right on the edge of the boot, if you look closely you can see it in the light.
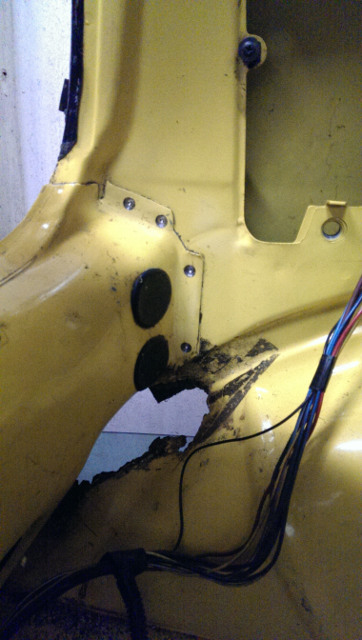
Fiat cinquecento rear panel

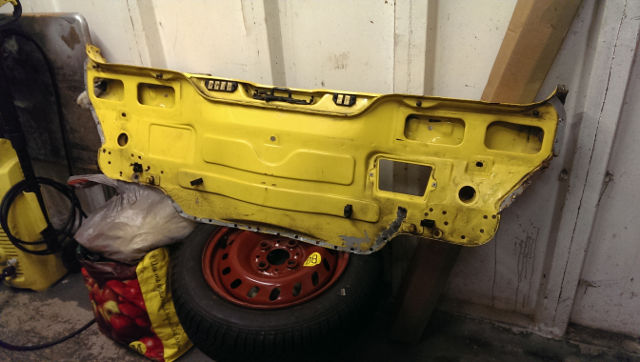
There are two more welds at either side of the rear panel connecting it to the boot floor, there isn’t enough access to drill these out, so a sharp chisel was used instead. This is the section with the rear panel removed.
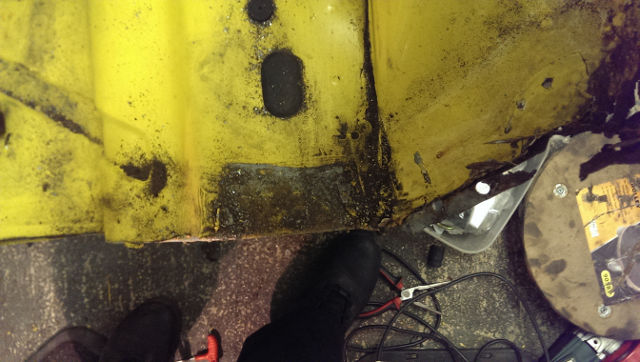
Fiat cinquecento rear panel

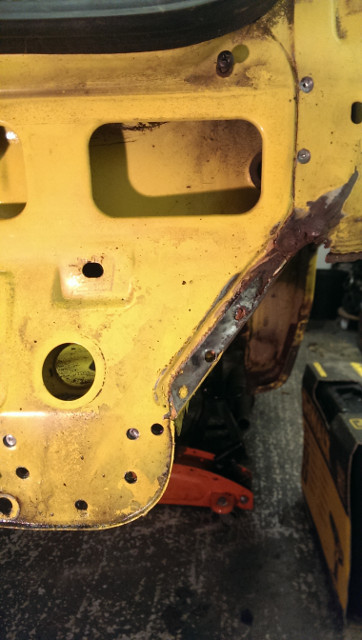
If all of the welds are free the panel can be pulled out fairly easily, the flanges where we drilled out the spot welds earlier needed bending out the way slightly, but they will go back fine and the offside flange needs repairing as half has rusted away.
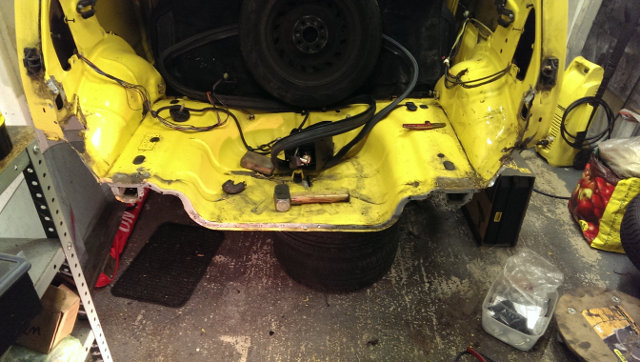
Fiat cinquecento rear panel

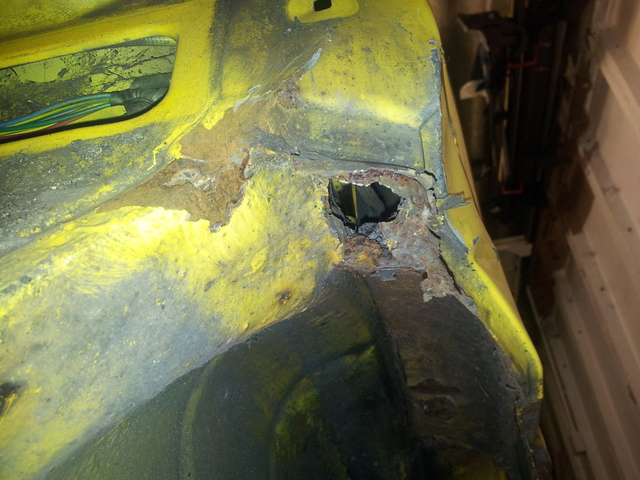
This is the worst hole in the boot, hopefully I can leave the flange in place and work back in to the wheel arch
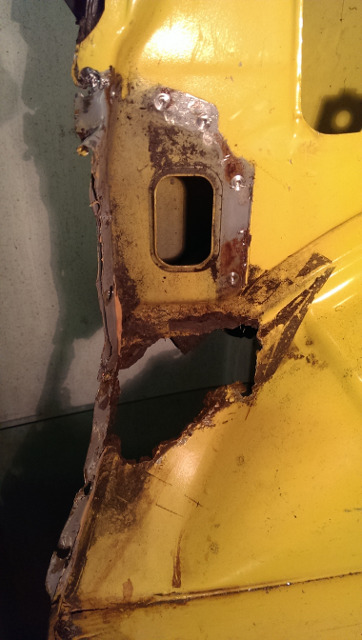
Fiat cinquecento rear panel

This is the side which was professionally repaired by Fiat, you can see the bottom corner is completely rotton again and would end up like the other side eventually, a big chunk of the flange further down on this side is completely gone and needs replacing (can be seen in photo four above).
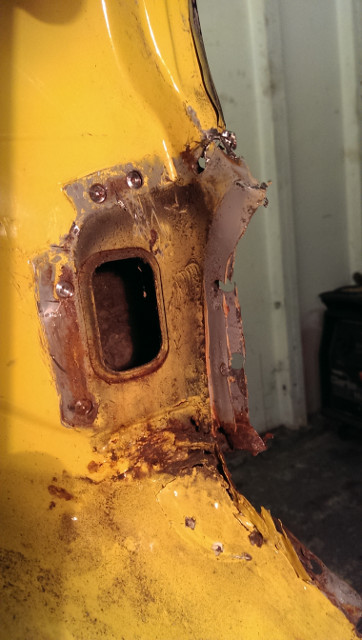
Fiat cinquecento rear panel

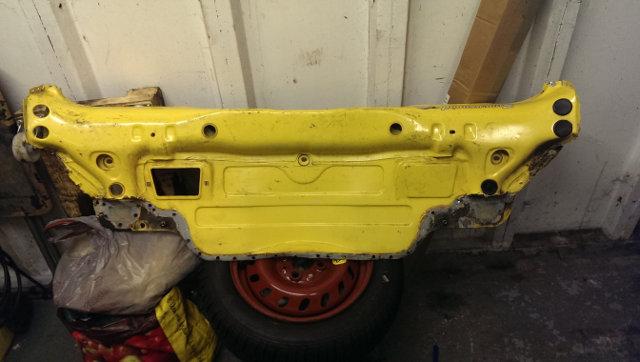
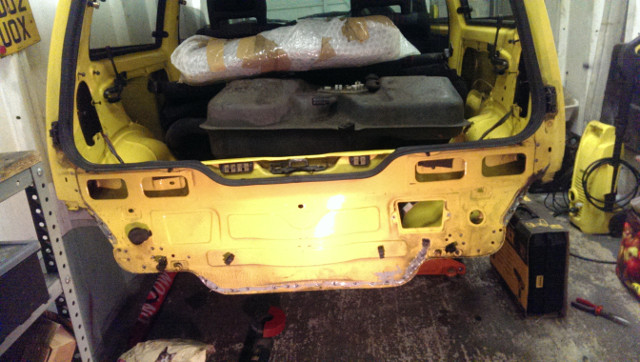
The rear panel
Fiat cinquecento rear panel

So I’m left with a completely backless Cinquecento, with more than enough access to fix the rusty holes in the boot and replace the damaged quarter panel section.
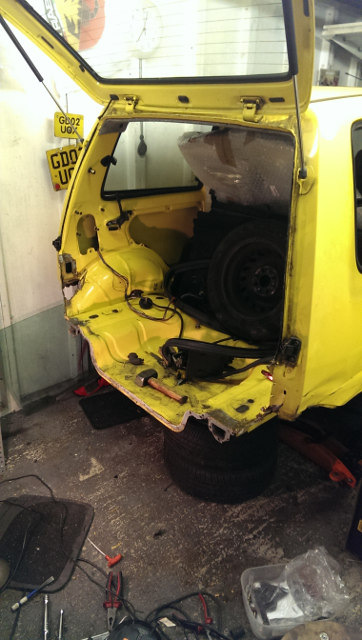
Fiat cinquecento rear panel

If anybody wants higher resolution versions of any of the photos featured in these posts, or would like a photo from another angle just send me a message and I will get one.
New Beam and a Quick Hose Down

It has been a while since I have had time to spend on the car, I have not been able to get hold of a welder and didn’t really want to start working on the engine in the garage as I wanted to flush out the cooling system first.

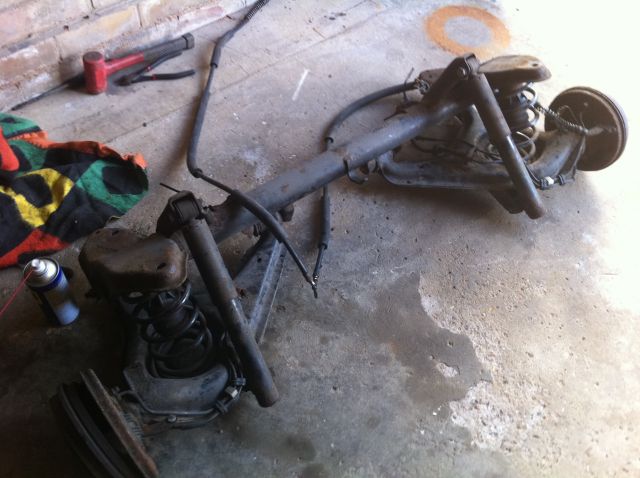
Last week an advert popped up on the Fiat Forum for a chap selling a bunch of parts from a Fiat Seicento Schumacher edition, including a complete rear beam with suspension and brakes still attached for £20 !  It was up near Leicester but for £20 it was worth the drive as it was straight and only had a bit of surface rust.

Complete rear beam

On further investigation it has ABS hubs still with the sensors attached, they seem in good working condition so I will sell them on ebay as they are of no use to me. The whole lot came off a running car so the brakes, springs and shocks are in good condition, I guess I will know if the shocks are any good once I remove them from the beam.

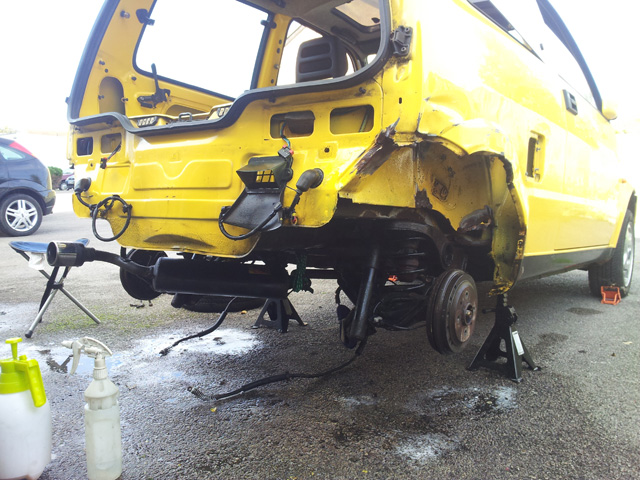
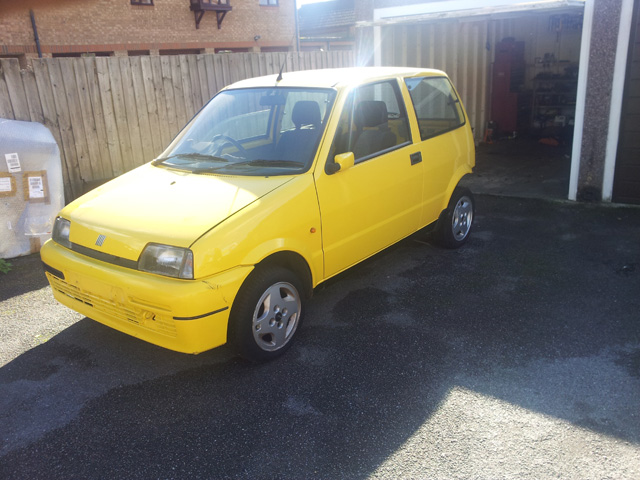
I wanted to get the car out of the garage to hose down the rear underneath of the car, it was the one thing I forgot to do before putting it in the garage, the dirt was making it hard to see where the rust ended and the car started. It took a bit of man handling to fit the beam complete like this, but with a helping hand from Kelly we got there in the end. It was nice to get it out the garage, I though it was going to be stuck in there forever !

Sun light at last

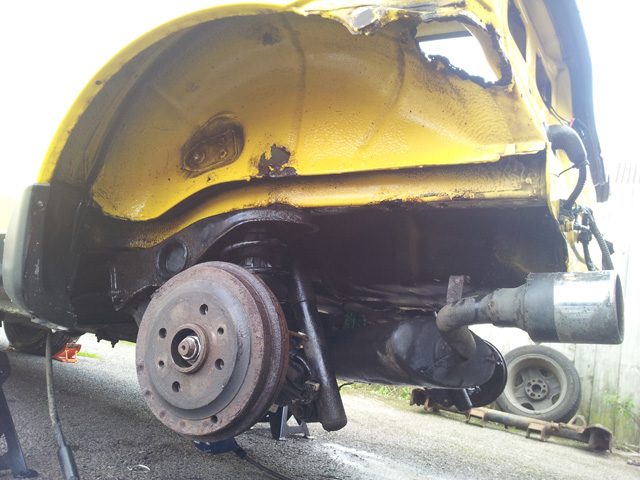
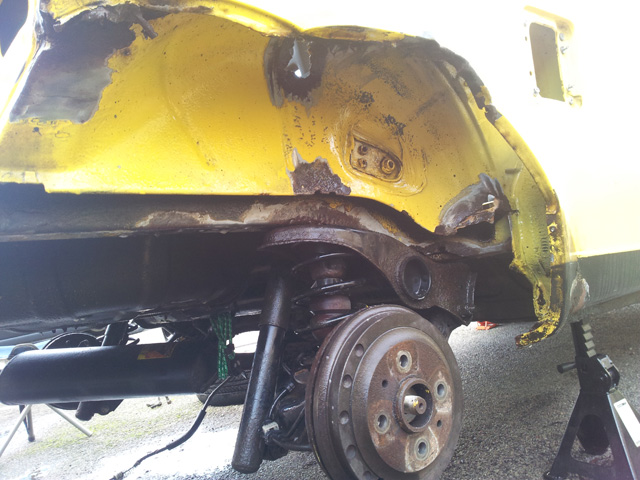
I had a go at the aches and underside with a pressure sprayer and some strong pre wash, it quickly shifted the dirt and revealed the corrosion in the inner arches was not quite as bad as it seemed, although as you can see here it is still quite bad.

Clean and full of holes

You can see where the arch is bent in this photo

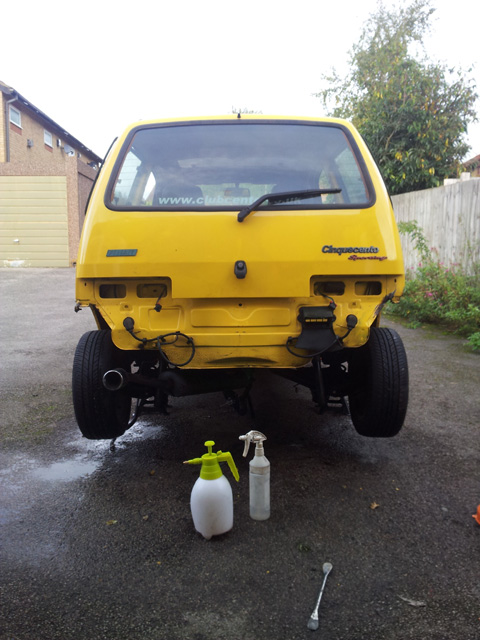
A view of the back

I like the look of cinquecento’s with the rear bumper off.

Looks a bit like a buggy

So that was my weekend, the car is now back in the garage waiting to come out to have the cooling and oil systems flushed, so I can then change the head gasket and anything else the engine will need. Hopefully I can get hold of the welding gear and work on the car over the winter.

Quarter panel arrived

For a little while now I have been on the look out for a replacement rear wheel arch panel, or even a full quarter panel to replaced the damaged section on the car. I had tried the usual people like big Mick at Euro Car Care in Derby and some of the major supplier of car body panels, but unfortunately it appears only Fiat produced full replacement quarter panels and big Mick informed me that due to the age of the Cinquecento they are now discontinued and unavailable. A member on Fiat Forum was in contact with a chap in Poland who was said to have replacement wheel arch panels, but unfortunately these never materialised.

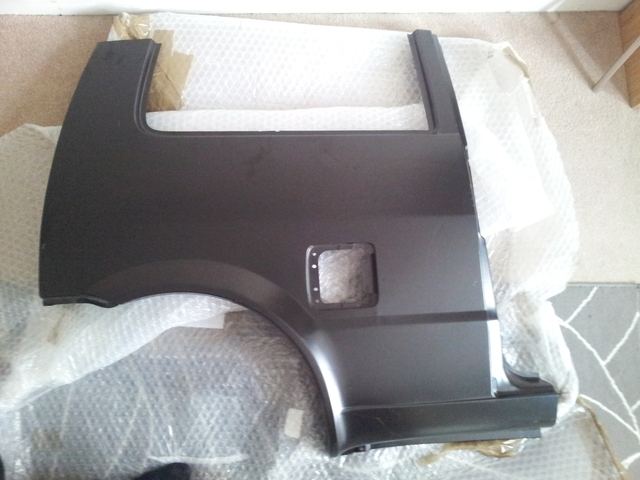
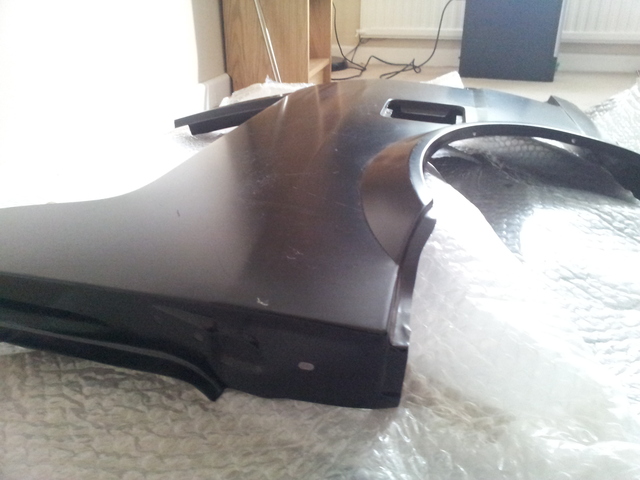
Whilst trawling Ebay a couple of weeks ago I came across a Fiat dealer selling a new old stock drivers side full quarter panel for a Cinquecento ! I jumped at the chance and snapped it up straight away. It’s brand new with no damage and is a genuine Fiat part ! I had to pop to the DHL depot today to collect it and couldn’t wait to open it and confirm that it was the real deal. Much to my joy it was as you can see here.

Full quarter panel

Full panel including the corner

What made this even more useful was the fact that it isn’t just a flat panel, but it includes the corner with is slightly bent inwards on the car and my biggest concern.  I have yet to get the car to a bodyshop so for all I known they might not even need it, but I would rather have the panel and not need it, then need one and not be able to get hold of anything.


A package from Poland

A week or two ago I ordered a load of Cinquecento parts from a Polish web site, with the conversion rate it works out a couple hundred pounds cheaper than even the cheapest of Fiat dealers !

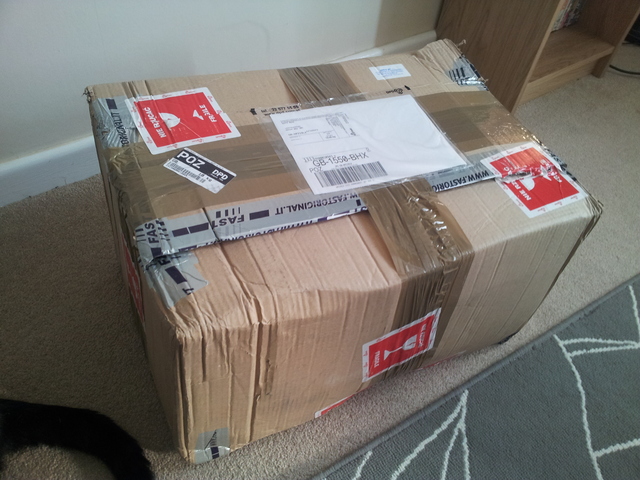
Today I got home from work and was greeted by this.

Large package

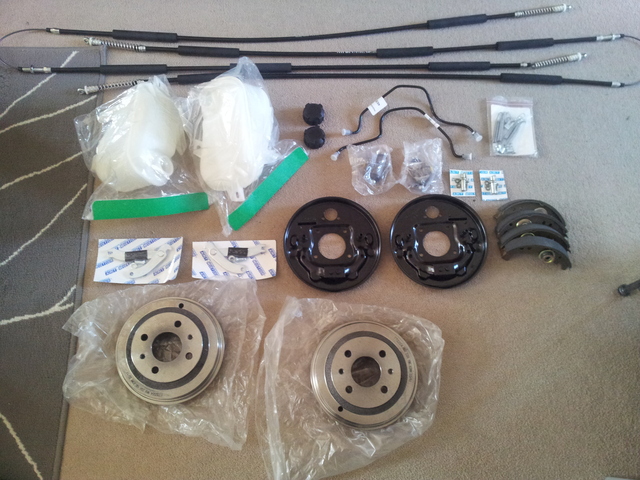
After spending a few minutes fighting with a mile or two of bubble wrap I had all these shiny new goodies laid out on the floor.

New shiney parts

As you can see the back brakes are being replaced with all new parts, along with the header tank from an MPI Seicento as they are better looking than the SPI Cinquecento ones, I got two as the one in my green Cinquecento is tired along with a new handbrake cable. All that lot only came to just over £100 including delivery and they are all genuine Fiat parts!

Cam shaft and gear stick

I would love to crack on with the welding, but unfortunately the family member who is going to assist is busy until the start of July. So I decided to crack on with some of the other jobs which need doing, including having a look at the condition of the engine.

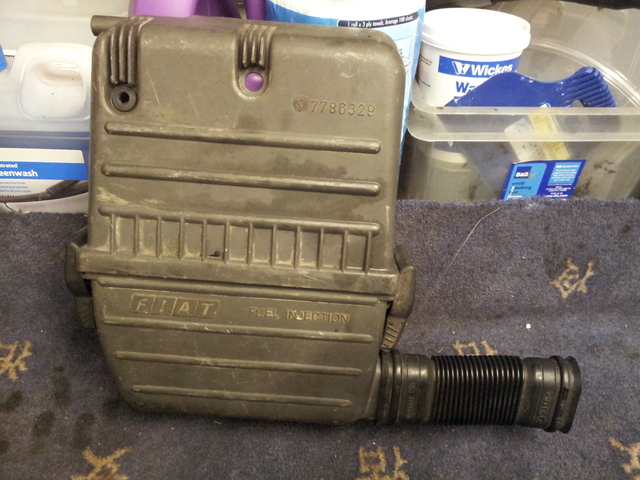
First up the air box had to come off, it’s only held on by a couple of bolts so that didn’t take long.

Airbox removed

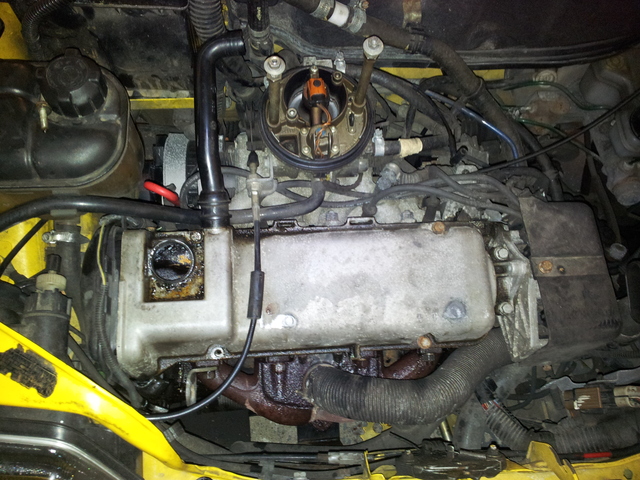
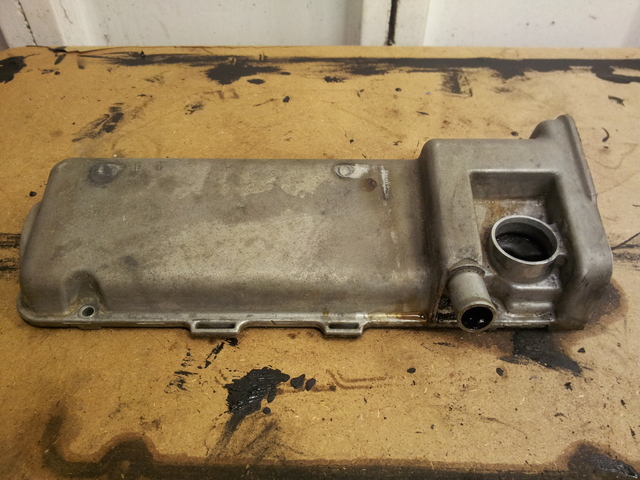
Next up was the cam cover, this is bolted down with about half a dozen bolts which all came out OK. You can see in this photo that the rocker cover gasket has been leaking, the front of the engine is a right oily mess !

Cam cover fitted

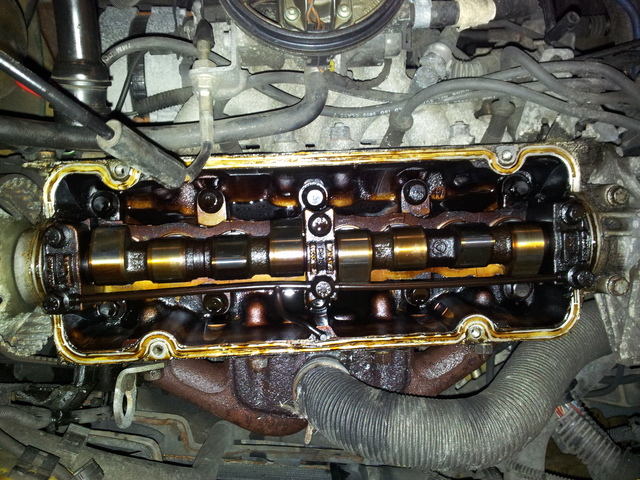
I was pleasantly surprised by the condition of the camshaft and how clean the top end was looking, you would never guess that it had done 100k miles !

Camshaft

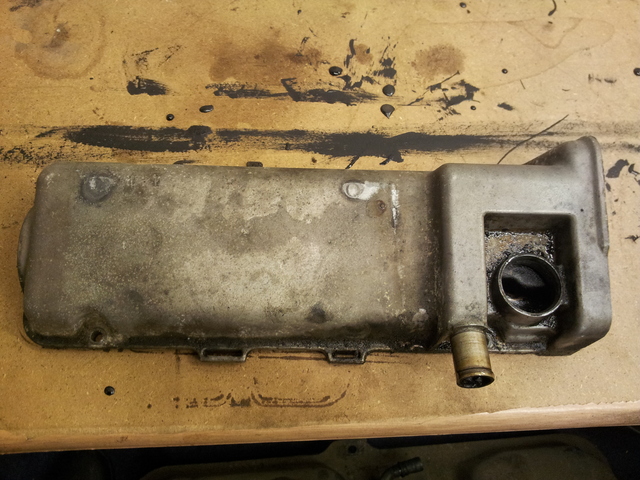
I plan on giving the cam cover a good clean and polish, it’s condition is good and should clean up nicely.

Dirty rocker cover

A splash of degreaser and it was looking better already.

Clean rocker cover

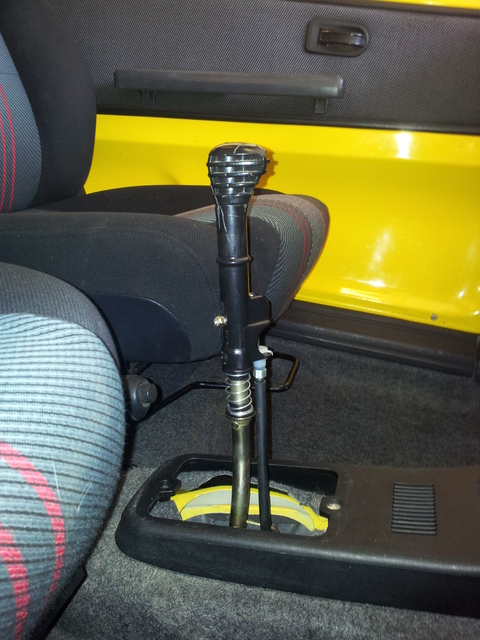
By this time it was getting late and didn’t want to annoy my neighbors by polishing the cover using mops on an electric drill. I will do this another day, but I did replace the scabby gear knob.

After

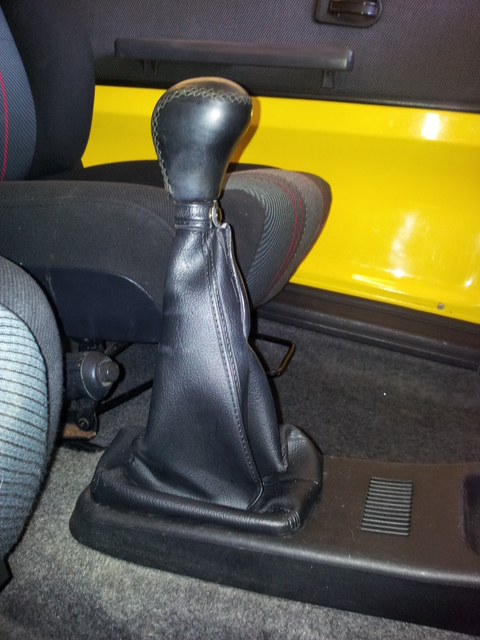
Andre had a spare gear knob which he kindly gave me, I managed to source a great condition original gaiter as well which finished it off nicely.

Looks brand new

I came across a guy not too far from me breaking a Cinquecento sporting, it had some issues with rust and the paint was a bit of a state so I can’t blame him for breaking it. I managed to get quite a few great condition parts for this project from him, including door arm rests, a yellow sporting front bumper with no cracks, the gear gaiter shown above, like new matching rear lights and a few other bits and bobs I needed for my green SX

Rust assessment

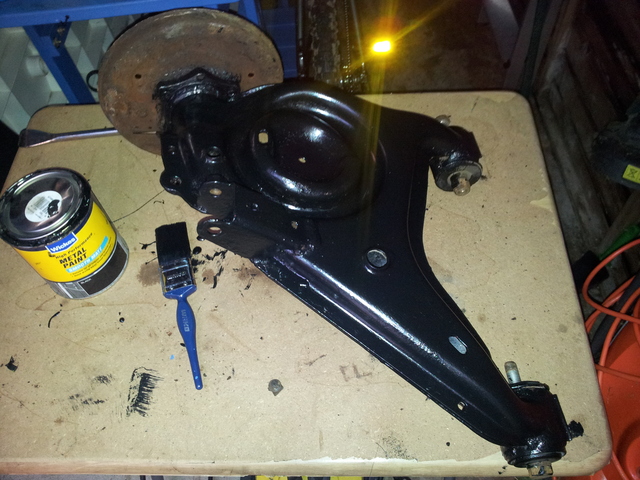
I had a rather filthy day with the Cinquecento, my main focus being on cleaning and painting the trailing arms, along with grinding back some of the rust on the car, so that I can assess how much new metal needs to be welded in.

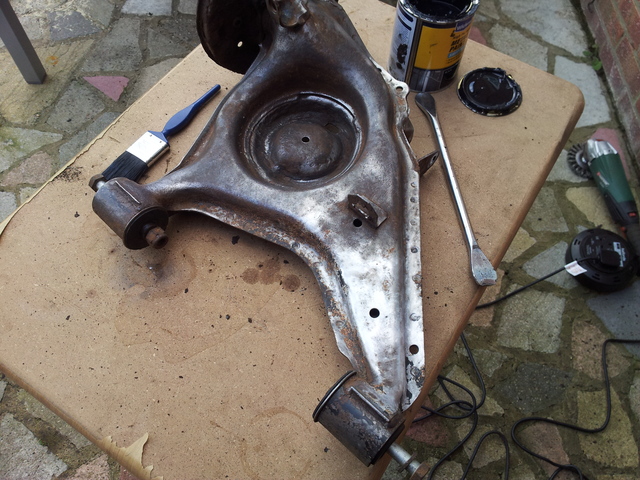
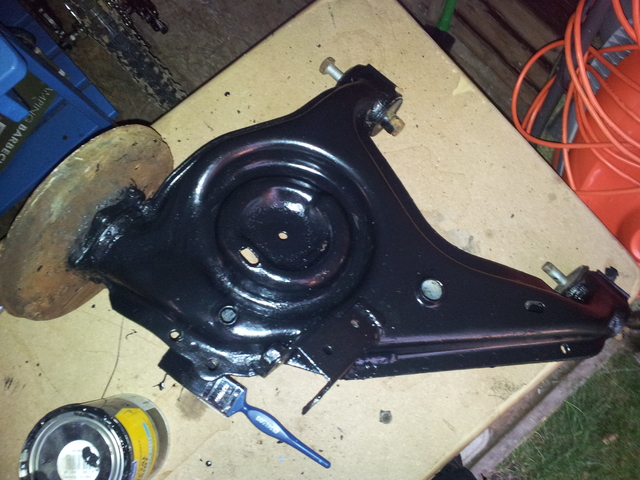
First up was the trailing arms, although due to the constant heavy down pours of rain, I only managed to get one cleaned and painted as space is rather limited in the garage at the moment so I had to do them in the garden.

After a going over with a wire brush on an angle grinder we had this.

Nice and shiney

I do appologise for the poor quality of the after photos, only I had to move to the shed as the heavens opened !

The observant will notice I didn’t paint the brake back plate, this is because I have decided to replace them due to corrosion creating a few extra holes, only I forgot to remove the hub nut and couldn’t get them off without the arm bolted to the car, DOH !

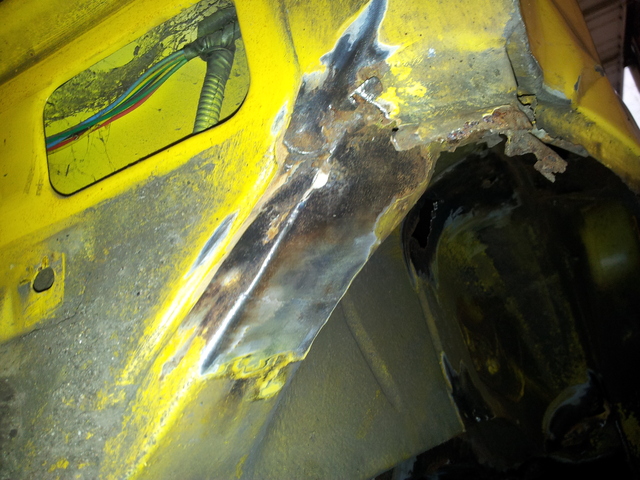
I then moved in to the garage to clean the rust from the holes shown in my previous post. It was actually quite a relief to see some nice shiny metal, as I though the rust was going to go on forever, leaving me with nothing to weld to.

This back corner appears to be completely solid which I was surprised about, as it had a fair amount of rust which turned out to be just on the surface.

Off side rear corner

Unfortunately I did manage to create a couple of more holes on the inside of the wheel arch, as the rust had completely gone through to the inside of the car. A couple of small plates welded in should sort this out.

Inside wheel arch holes

The holes underneath didn’t grow much in size when attacked with the grinder, which was a relief. Do you think I will have to cut out the pitted metal, or would a rust converting product from the likes of Frost make it safe to leave in and weld to ?

Drives side rear chassis rail

Pitted metal

Front of the rear drivers side chassis rail This looks worse than it is as a lot of what appears to be rust is just griding dust I forgot to wipe off.
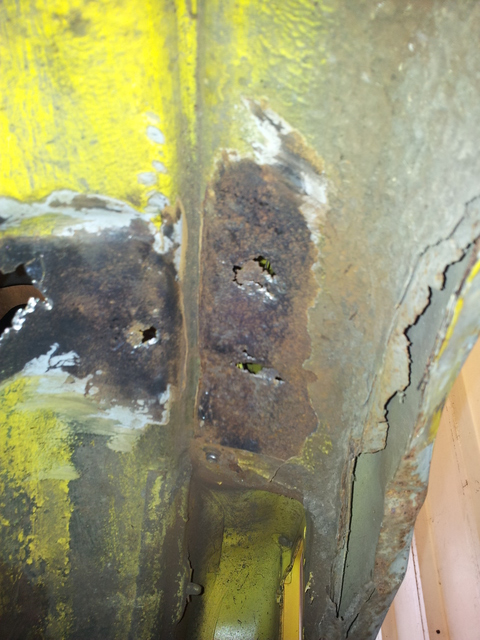
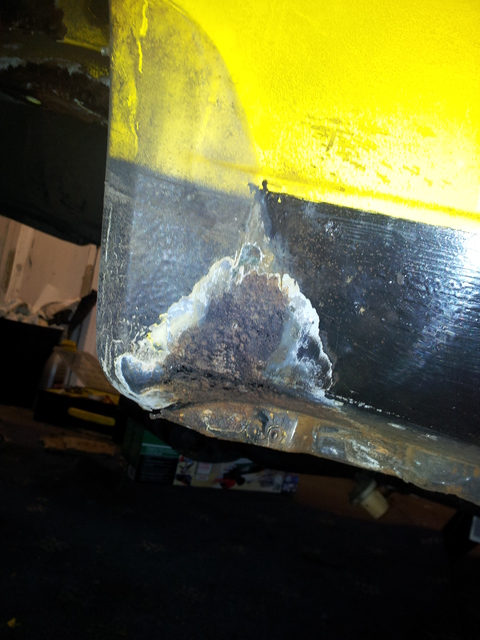
Even the inner wheel arch actually has some solid metal ! I might get away with a few repair panels, rather than trying to fabricate a complete inner wheel arch. I still need to get in there a bit more though with the grinder.

Drivers side inner wheel arch

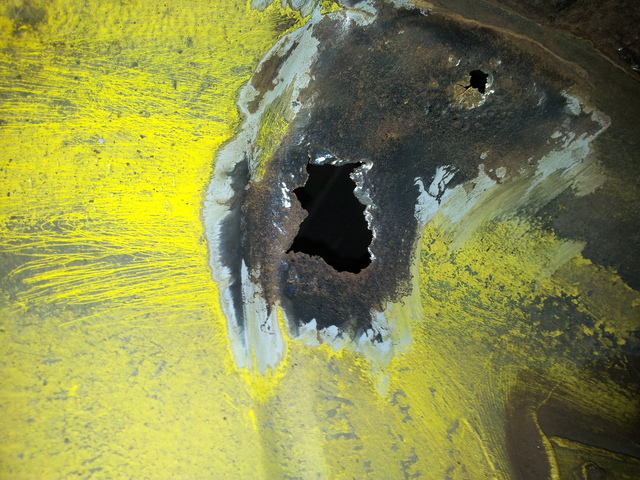
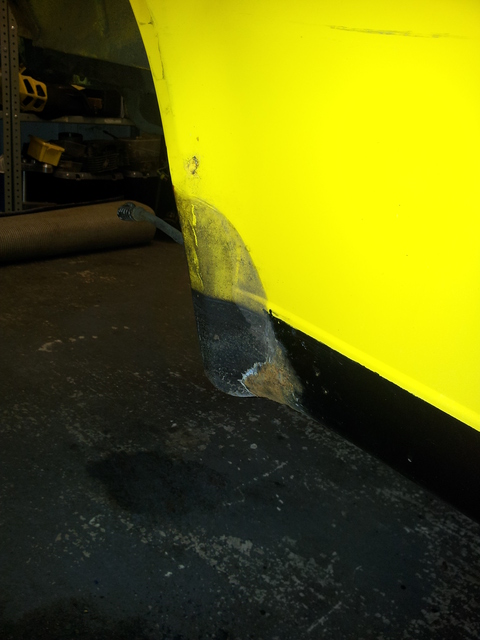
The only section which was worse than I expected was the outer lower arch, the plastic cover has held moist dirt on to the metal causing this corrosion, there is a tiny hole which you can’t even see in the photo which needs filling, I reckon it could be filled with a splash of weld ?

Tiny hole

All this and I haven’t even properly looked at the near side, hopefully it won’t be quite as bad ! Although I have to say it is nice to see where the rust stops and that it should be repairable with a few long sessions with the MIG welder.

I cannot wait to start welding the new metal in, and then get some quotes to have the crash damage repaired.

Fuel tank removed

After a busy couple of weeks I managed to grab a few hours out in the garage. The main areas I wanted to focus on was removing the fuel tank and making a start on assessing how much rust there really is.

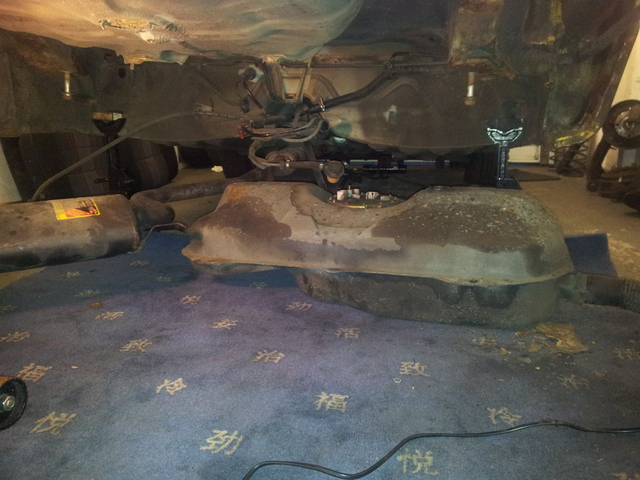
Before I could get access to the areas effected by the rust the fuel tank had to come out. This is straight forward as it’s only being held in by one bolt and two nuts, as I removed the other two bolts when the beam came off. Oh and don’t forget the couple of plugs and hoses going in to the fuel pump.
Fuel tank dropped

There was a few litres of fuel left in the bottom of the tank, so I drained this out in to a jerry can as I wasn’t keen on filling the garage with fuel vapor…

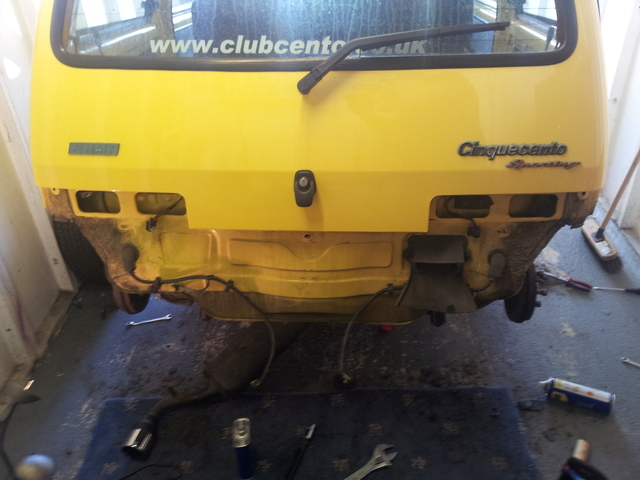
Access at last !

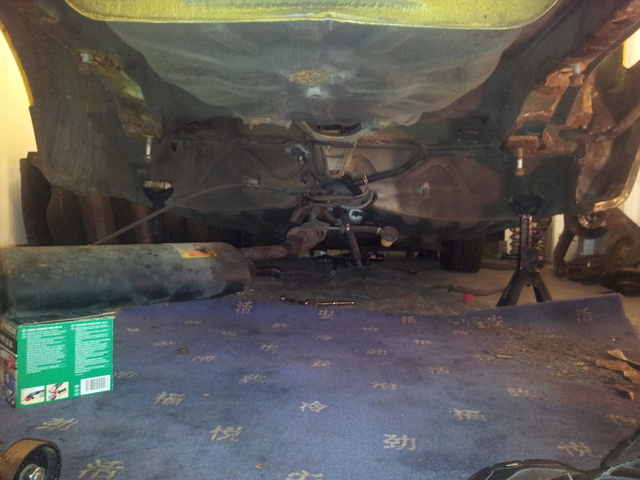
Rear end completly stripped

After a short period of time with a wire brush and a screwdriver, I had managed to dislodge a fair bit of rust leaving me with a few holes….

Inner and outer arch seperated

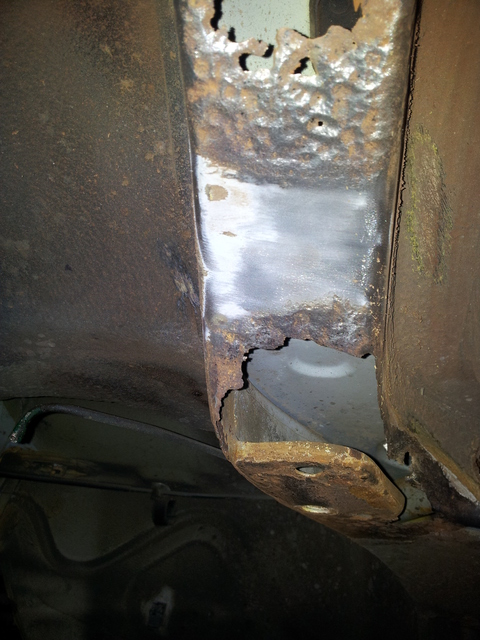
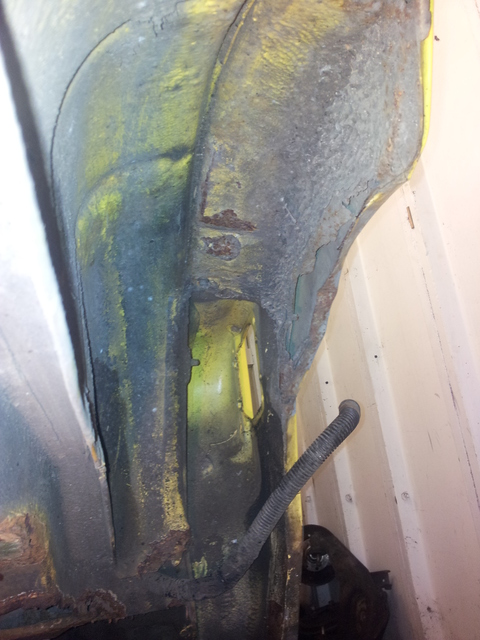
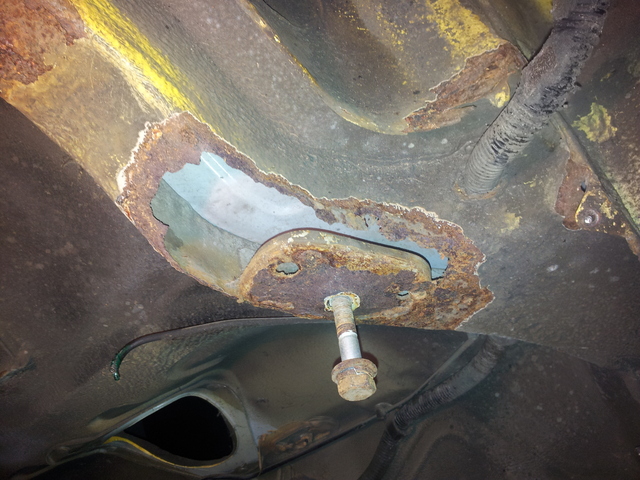
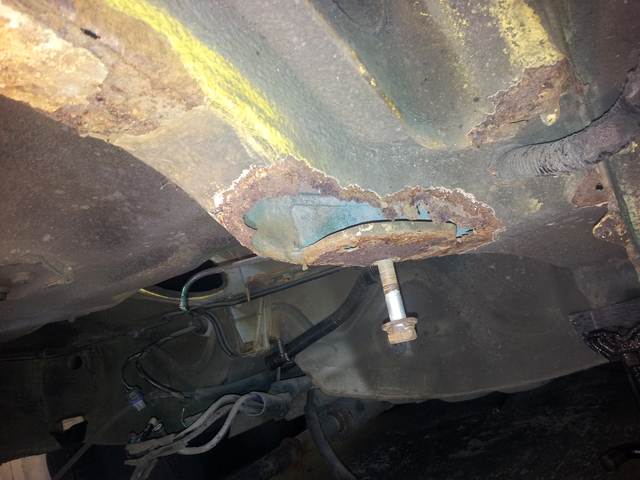
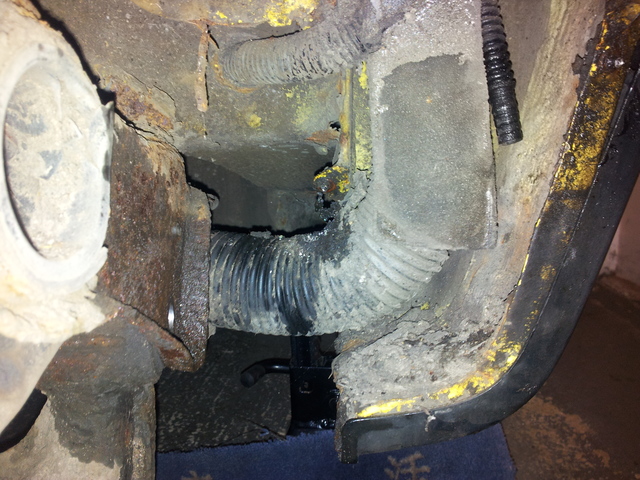
You can see where the rust has caused the Inner and outer arch to separate, I haven’t yet had much more of a poke around in that area, the worst area was where the beam bolts to the chassis.

Eak

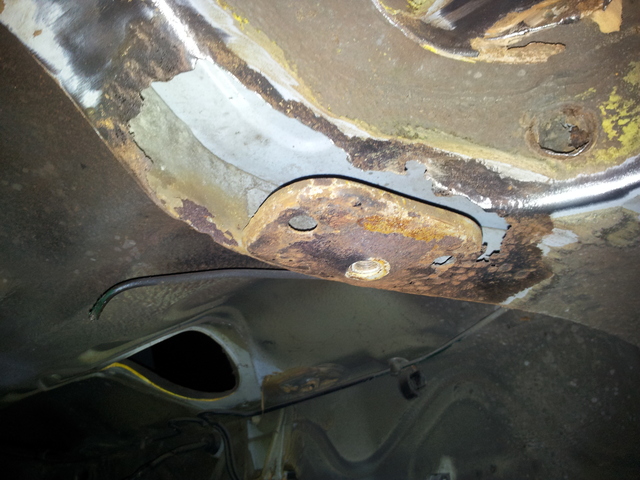
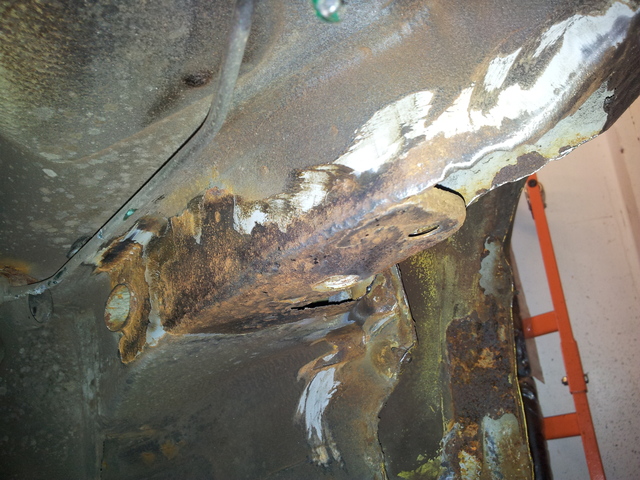
The plate the bolt is screwed in to was solid and only had light surface rust, the rest crumbled to nothing leaving that huge hole and a less severely rusted edge. I can already tell the other side will be very similar. Another angle.

rust

The back rear beam mount has some rust but not as bad as this. I decided to call it a day as I really wanted to crack out the angle grinder with wire wheel attachment but it’s getting late and I don’t have very tolerant neighbors…maybe next time.

Just a couple more photos

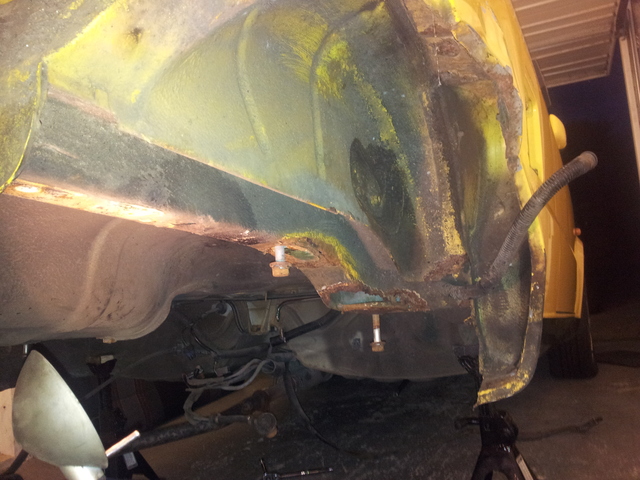
Wide angle

The back right corner has some corrosion as well…from this angle you can see where the panel is bent in from the bump the car had, this should pull out no problem when I take it in to the body shop.

Rusty bent corner


Rear suspension and beam

Now the rear brakes have been stripped down I wanted to get the rest of the rear dismantled, this being the shocks, springs, arms and rear beam. Now the photos are a mixture of both sides of the rear as I kept forgetting to take them, as it goes it wasn’t a bad task to under take.

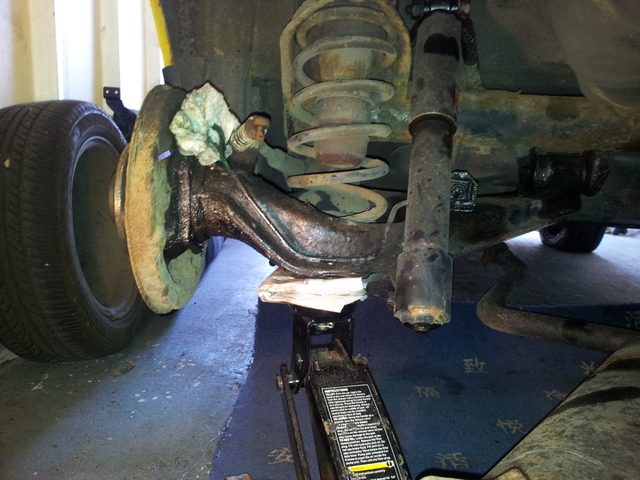
First of I lightly supported the weight of the rear arm with a jack, this took some of the strain off the shock and made it much easier to get the bottom bolts out.

Support the arm

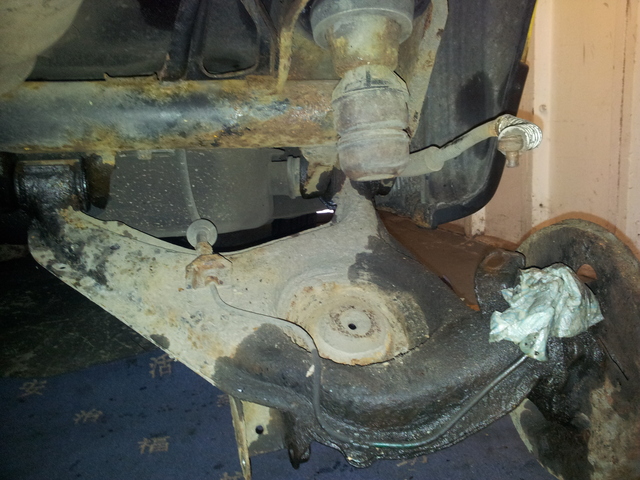
Once the bottom bolt was out it was just a case of pushing the arm down and the spring was free and could be removed.

Springs removed

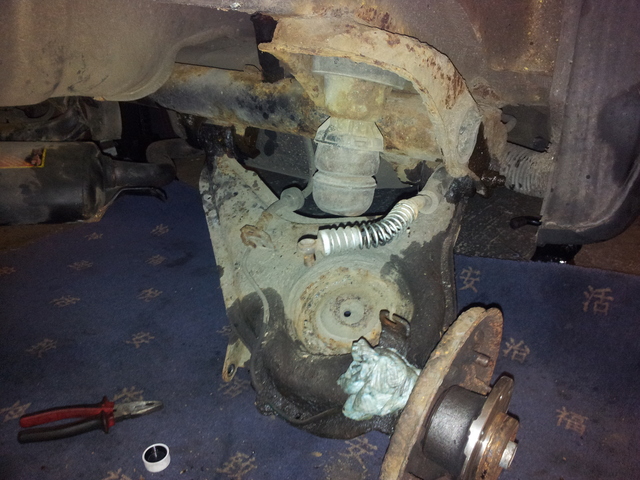
Another view with the spring out

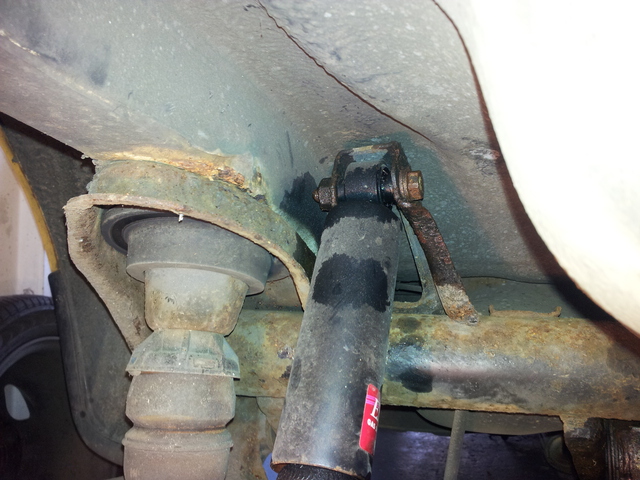
A bit of Plusgas on the top shock mounts was all it took to free off the bolts, which came out with little fuss although it was a bit tricky get a spanner/socket in the gap and on to the nut.

Top shock bolt

Suspension free

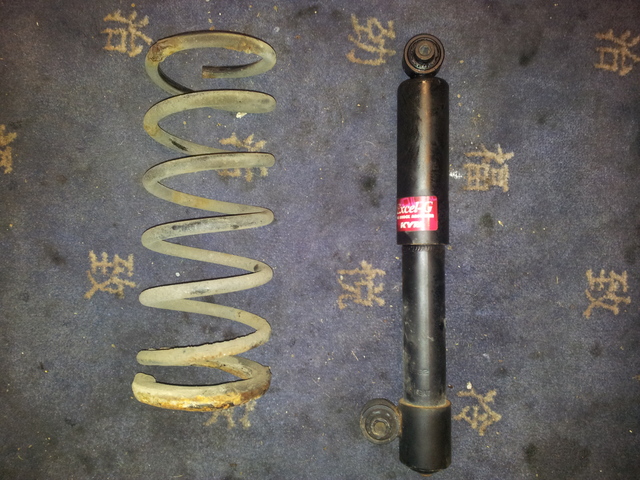
The shocks were actually in really good condition, these will be cleaned up and put back on the car in the future. The springs were also pretty good although a bit grubby with some light surface rust, I might see if I can get some flexible paint to refurbish them with or maybe even powder coat them.

The bolts holding the rear arms on came off without a fight, although it did take a fair bit of force to get them going and some lubricant to ease them out.

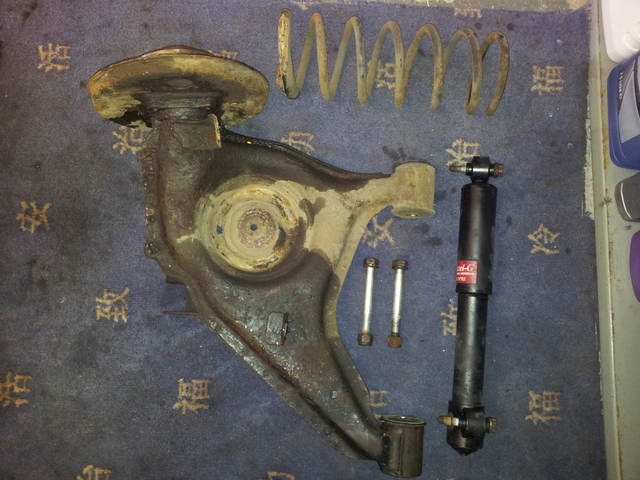
Rear suspension complete

Again the arms are in great condition and just require a going over with a wire brush, followed by a coat with a decent rust preventing metal paint in satin black. To get the arms off I had to cut the other end of the brake pipes,  as the ends were seized on to the flexible hose.

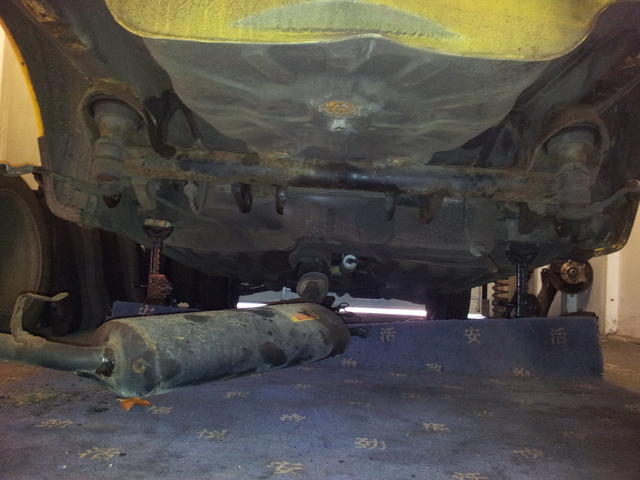
Stripped suspension

Looking bare down at the rear now.

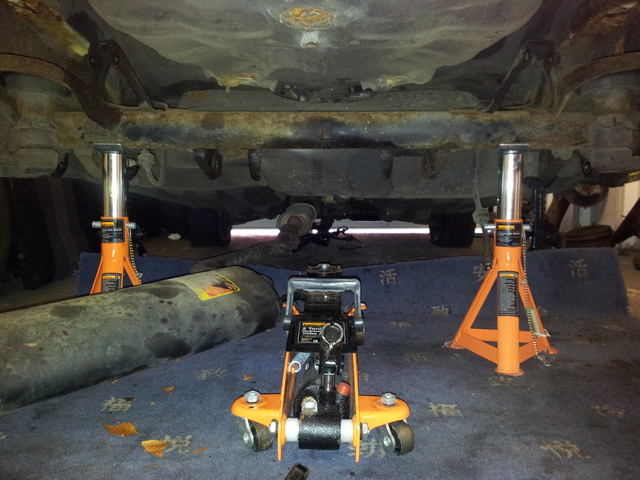
Next in line was the rear beam, I read on the forum that the beam is heavy so I took extra precaution when it came to taking it off. The beam is only held on with four bolts which came out nice and easy, before I completely removed the bolts I supported the weight of the beam with a trolley jack. After pulling the bolts out I lowered the beam on to a couple of axle stands.
On the axle stands

I promptly realised the beam was snagged on something, this turned out to be the flexible brake pipes which needed a couple of retaining clips knocking out. I tried to lower the beam again but it was still stuck, I then twigged that the rear fuel tank mounts bolt to the beam, and that I forgot to undo them !

Shame on me as I have changed the fuel tank on my other Cinquecento and should have remembered, and the exact same thing happened as well…when I tried to remove one of the two bolts, the bolt sheered leaving a stud in the beam .

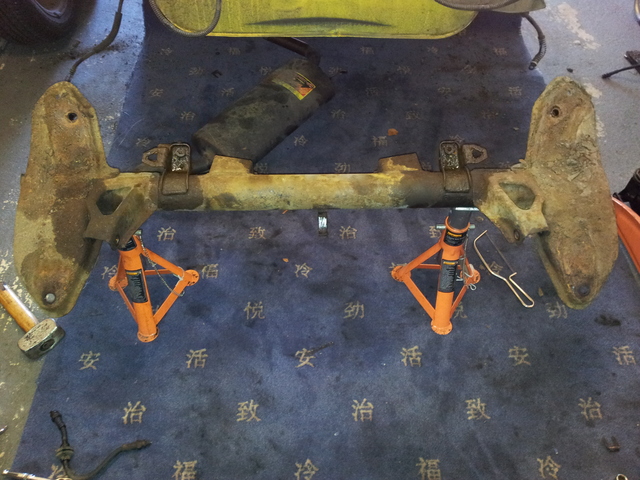
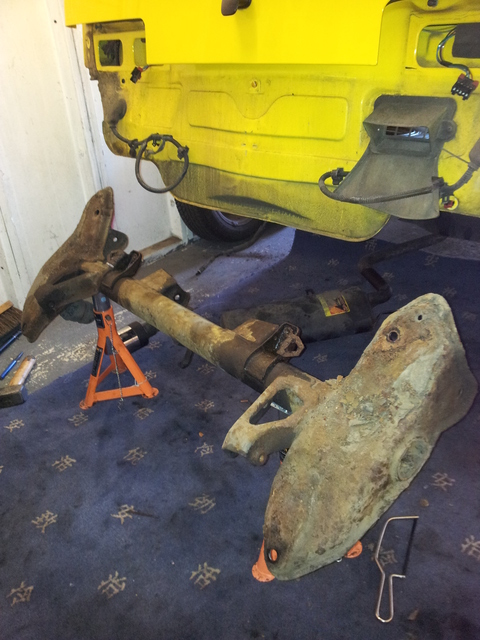
Now the beam is completely free and I was able to lower it down on the stands and pull it out from under the car.

Beam from the top

Rear beam from the side

The beam has a fair amount of rust some of which is quite deep, I will give it a clean up and decide whether to replace it or not, although I have a feeling it will need to be replaced.

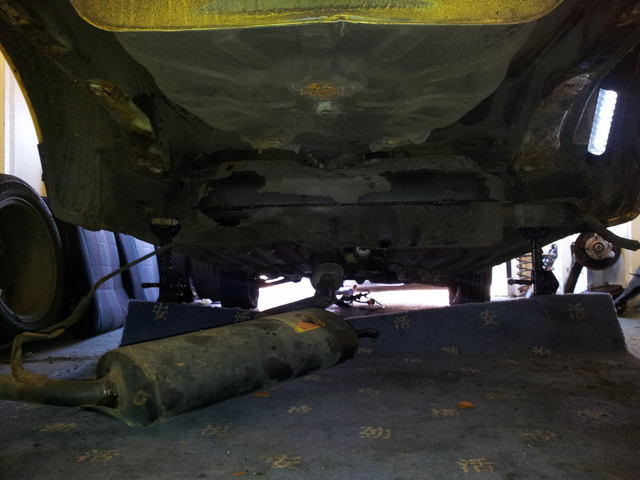
The only thing left to remove before I can start cleaning the metal and assess the rust is the fuel tank, I think I will do this next time as the weather was scorching and the garage gets bit warm !

Looking bare

The other parts I removed were the off side wheel are inner and outer plastic covers, both of which unearthed more rust. The securing bolts all rounded and needed drilling out, might try replacing the nuts with rivnuts.

Surface rust

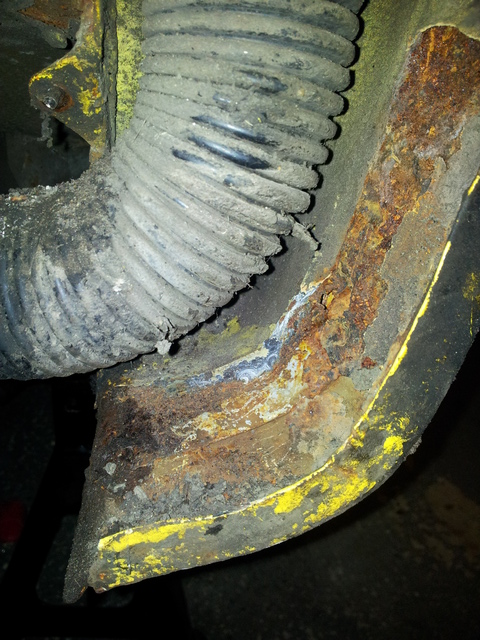
This rust on the outside isn’t too deep, and might not require any welding but I will see what its like after a go with a wire brush. The inside is looking a little worse and the amount of mud sat behind the cover was quiet unbelievable, and I guess the cause of the rust as it was holding moisture on the metal.

Look at all that mud

A moment spent scarping the mud and dirt away left me with this.

Rust

The outer skin appears ok but the inner skin which I guess is part of the inner wheel arch panel has some deep rust, mainly in the bottom section where the dirt was collecting. Again I will clean it up with a wire brush and see what attention it needs.

I got a fair bit done in this session and I don’t think I will have much time to get out next weekend as it’s Easter and I have a fair bit planned with the family.

I have however just bought an angle grinder and wire wheel attachment, that should make cleaning up the rusty metal a whole lot easier ! Bring on the sun shine.

Drum Brake Removal

I popped out to the garage this evening to put away my recent delivery of detailing products and before I knew it I was kneeling on the floor swearing at the rear drum brakes ! It’s amazing how easy it is to get distracted by the car and end up loosing an hour or two pulling parts off of it.

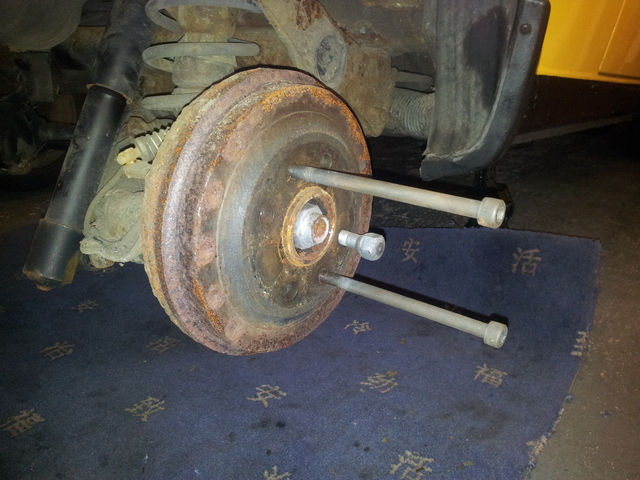
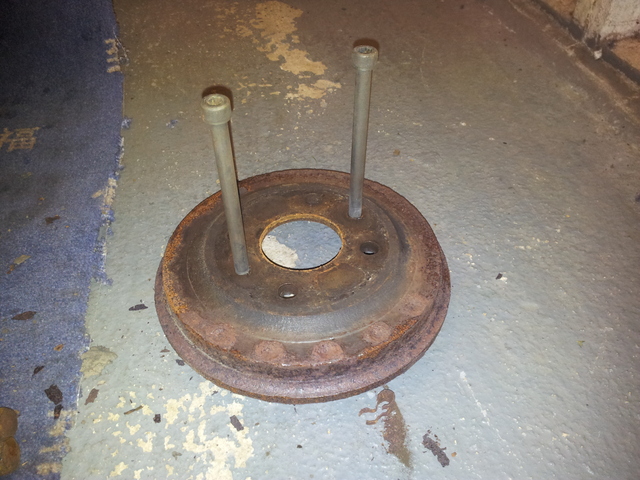
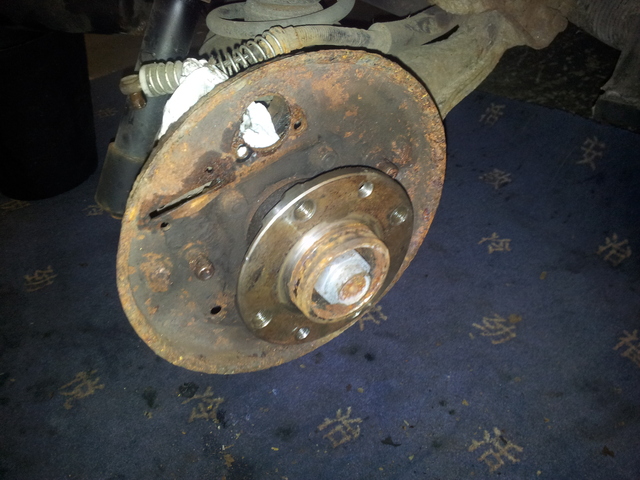
I had removed the drums on my other Cinquecento so knew what was hiding inside, along with the technique required to get the drum off. The best method I found was to screw a couple of bolts in to the two smaller holes left by the locating pin and and securing bolt.

Removing the drum

You then slowly screw each bolt in to the drum, gradually the drum is pushed away from the back plate and eventually pops off.

The drum is off !

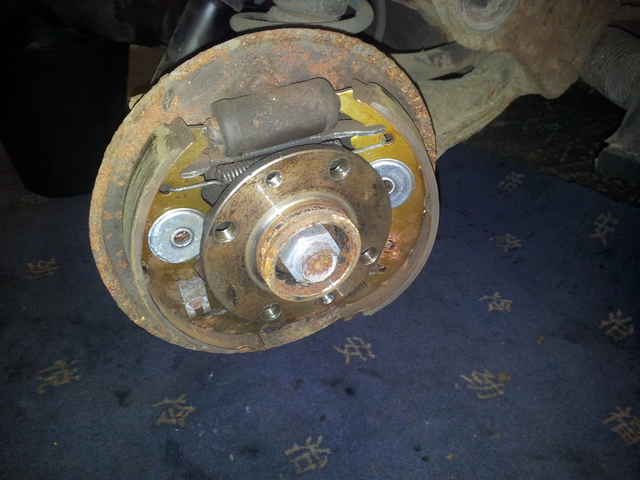
You are now left with the inner workings exposed, now this brake had been dragging and when the drum popped off it also pulled one of the stuck shoes with it, which you can see here.

Inner workings of a drum brake

Shoe falling out

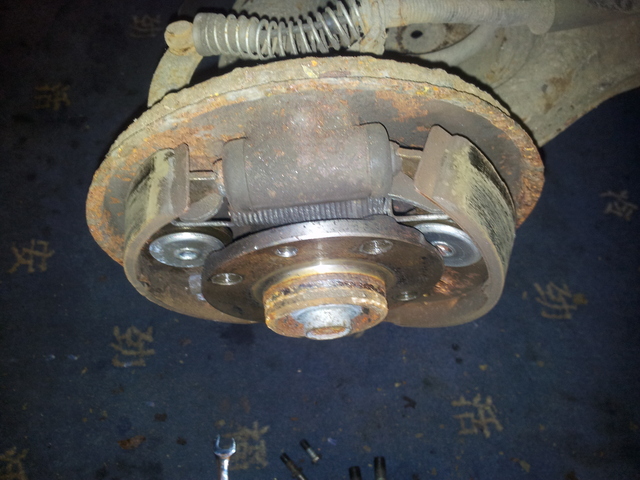
Now the hard part, which is removing the two return springs, one at the top and one on the bottom of the shoes. After a few choice words along with a bit of huffing and puffing the springs were off, the shoes then came out easy as pie.

Take your shoes off

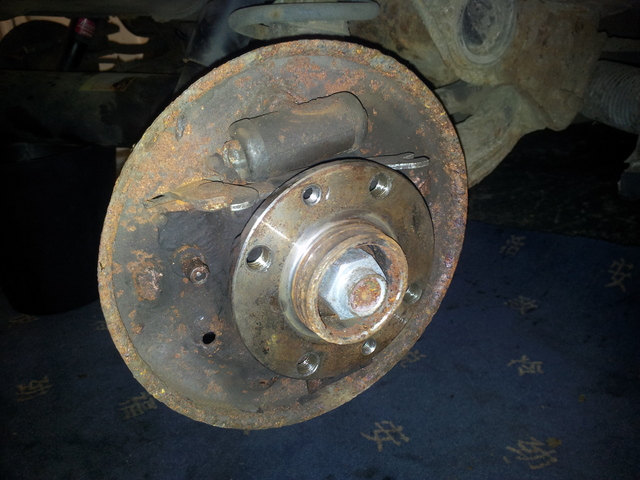
Next in line to come off was the hand brake actuator, as I expected this was seized solid and is a common problem on both the Fiat Cinquecento and Seicento. Unfortunately to remove the actuator the brake cylinder needed to come out, the bolt connecting the brake pipe to the cylinder was seized solid. I decided to just cut the brake pipe near the very end that way I can easily make another and use this one as a template, I dare say it had gone porous anyway. A couple of bolts later and the cylinder was off along with the actuator, this left me with just the back plate attached to the car.

Back plate

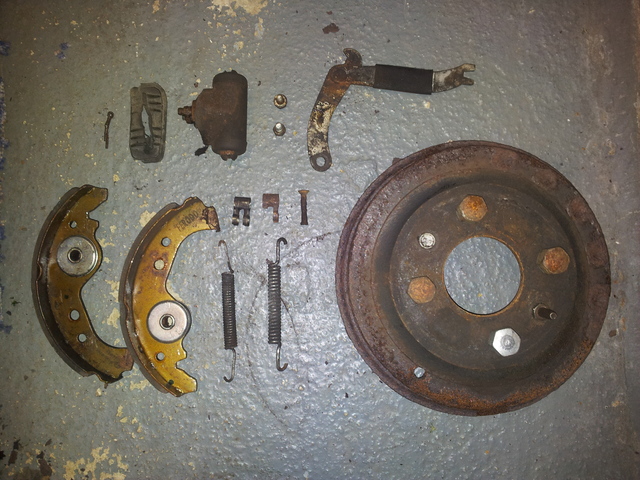
Drum brakes are very simple yet very effective, these are all the parts which made up the drum brake.

Brake parts

The majority of these parts will be replaced with new ones, the only part I will refurbish is the drum as it only has a bit of surface rust on the out side, there isn’t even a lip on the inside!

So my trip to the garage to put away some detailing products ended up with me completely stripping down one of the drums. Still it beats watching Eastenders !

Rear bumper removal

Decided it was time to have a crack at removing the rear bumper, having done this before on my other Cinquecento I knew what to expect and didn’t get any serious surprises. The only problem I had was removing the four bolts which hold the bumper mounts on to the car. Even after day of soaking in Plusgas they wasn’t cooperating and I didn’t fancy getting the blow torch involved as I have read that underseal is rather flammable…

I Ended up cobbling together a 4 foot breaker bar out of various bits I had in the garage, and using some caution was able to remove three of the four bolts ! Unfortunately one decided to round off and needed to be drilled out, but I won in the end and the bumper was off.

Bumper off !

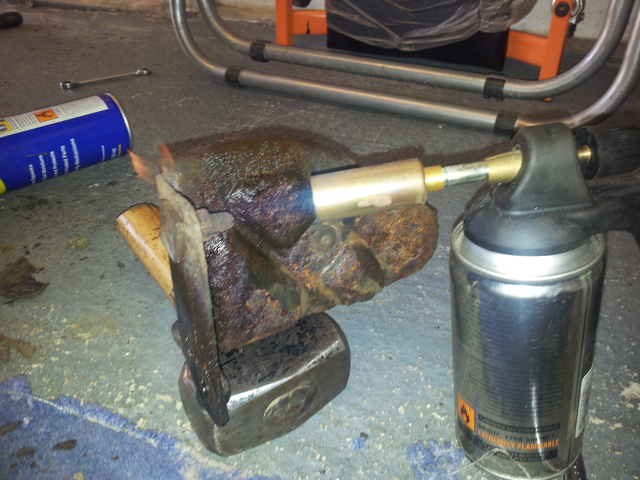
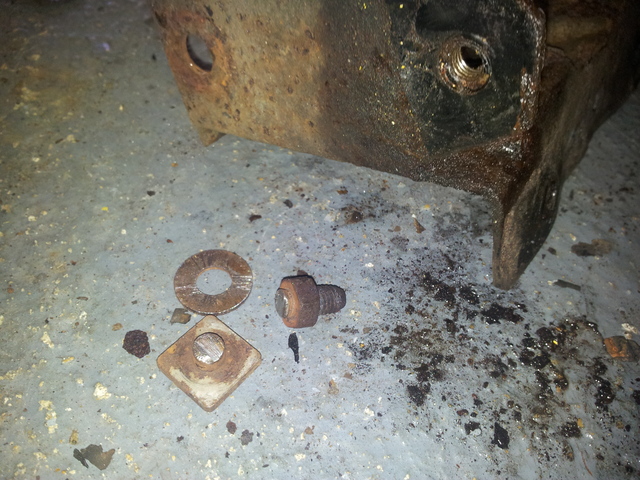
The bolts holding the mounts to the bumper were well and truly seized, even after a lot of soaking in Plusgas and a bit of this…

Fire !

I still couldn’t undo the bolt, out came the dremel and with a few seconds it was off with no damage to the bumper mount.

Cut off

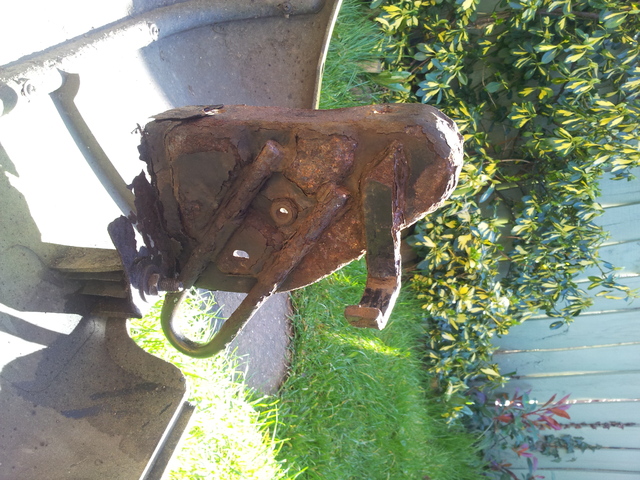
The bumper mounts are actually in reasonable condition, yes they are very rusty but compared with the swiss cheese I pulled off my other Cinquecento, I’m rather pleased and it won’t take much to sort them out. Although the other other was a little worse and a chunk came off during the removal process.

Damaged goods

I might be able to clean it up and weld a new section on to it, thats if I can find some clean metal to weld on to !

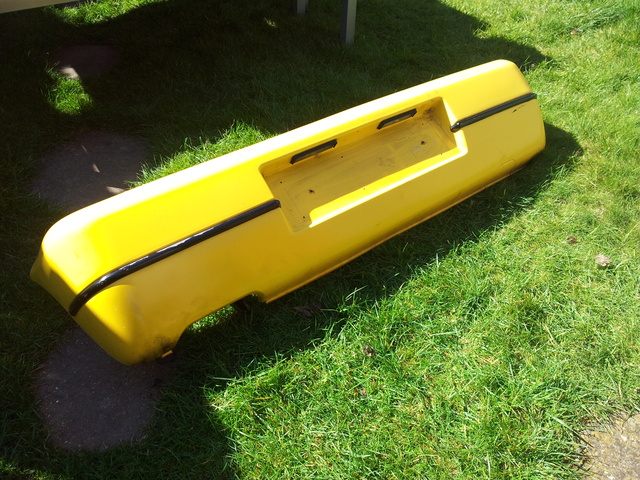
The bumper itself is in fair condition and should come up ok with a bit of Autoglym paint renovator, it has a few deep scratches but nothing a bit of filler and a can of paint can’t make good. The trim needs removing and a fresh coat of black paint applied, I will try to get some better photos when I get around to working on it.

Rear bumper

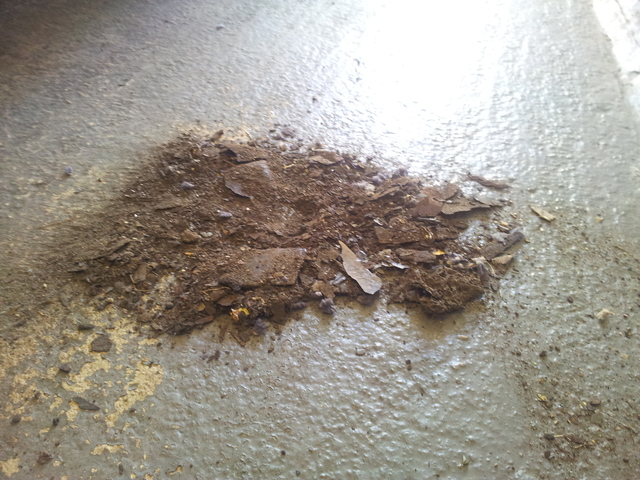
At the end of  the session I was left with a large pile of rust on the garage floor, I guess it’s shaving weight off the car ! Sums up what will be featuring heavy in my next post though…

Rust ahoy !